RHCE:PXE+TFTP+DHCP+APACHE+Kickstart
第一部分是随堂笔记,下面有详细的安装过程
kickstart通过DHCP配置自动化安装系统:
安装软件包:
yum install system-config-kickstart
生成kickstart文件的方法:
1.复制/root目录下anaconda-ks.cfg文件进行编辑
2.使用system-config-kickstart图形化GUI程序生成配置文件(不支持生成高级ks配置,如LVM,RAID等)
++++++++++++++++++++++++++++++++++++++++++++++++++
如果发现图形页面无法看到Package Selection时用以下方法处理:
在/etc/yum.repo.d/下修改repo仓库的名称为:
[development] #修改成名字
#name="Local classroom copy of dvd"
baseurl=file:///content/rhel7.0/x86_64/dvd
gpgcheck=0
再清理一下yum缓存:
# yum clean all
这样处理以后就可以看到Package Selection选项了
+++++++++++++++++++++++++++++++++++++++++
ks文件语法验证工具:ksvalidator
eg:#ksvalidator /tmp/anaconda-ks.cfg
比较不同版本ks.cfg文件的变化:
ksverdiff -f rhel6 -t rhel7
第一个扇区=512=446(mbr容量)+(每个分区的容量)16*4+2)
ks.cfg语法:
命令部分:
keyboard us
langen_US
bootloader --location=mbr --boot-drive=sda
text|graphical
timezone [--utc] Asia/Shanghai --ntpservers=ntp1.aliyun.com
clearpart --all --drivers=sda,sdb --initlabel
zerombr
ignoredisk --drivers=sdc
part part swap --size=2048
part /boot --fstype ext4 --size=100000
part pv.01 --size=8192
reboot|poweroff|halt
selinux selinux --enforcing|--disabled
authconfig --useshadow --passalgo=sha512
rootpw --plaintest 1234234pw| rootpw --iscrypted strings
firewall --disabled | enabled --service=ssh,cups
PV volgroup vgname pvname
network --drive=eth0 --bootproto=dhcp
services --disabled=NetworkManager
软件包部分:
%packages
@Component Name #软件组
package-name #单个软件包
-package-name #排除软件包
eg:
@base
@core
chrony
rsync
-NetworkManager
-autofs
脚本部分:
%pre #安装前脚本
%post #安装后要运行的脚本
clearpart
services
rootpw
part
tiemzone
network
cat> /tmp/rsc.log <<eof #将eof之间的值插入到rsc.log文件中
abc
eof
#清除rhel7.0网卡的命名方式
rm -rf /etc/udev/rules.d/70
ln -s /dev/null /etc/udev/rules.d/80-net-name-slot.rules
sed -i '/linux16/ s/$/net.ifnames=0 biosdevname=0/' /boot/grub2/grub.cfg
%end #安装结束
ks.cfg案例:
#platform=x86, AMD64, or Intel EM64T
#version=DEVEL
# Install OS instead of upgrade
install
# Keyboard layouts
keyboard 'us'# Reboot after installation
reboot
# Root password
rootpw --iscrypted $1$XUGOBOo8$BrYpenXf.WXvSjukZqBU51
# System timezone
timezone Asia/Shanghai --isUtc
# Use network installation
url --url="ftp://172.16.10.10/pub"
# System language
lang en_US
# Firewall configuration
firewall --enabled --http --ftp --ssh
# Network information
network --bootproto=static --device=eth0 --gateway=172.16.10.254 --ip=172.16.10.3 --
netmask=255.255.255.0
# System authorization information
auth --useshadow --passalgo=sha512
# Use text mode install
text
firstboot --disable
# SELinux configuration
selinux --enforcing
# System bootloader configuration
bootloader --location=mbr
# Clear the Master Boot Record
zerombr
# Partition clearing information
clearpart --all --initlabel
# Disk partitioning information
part /boot --asprimary --fstype="xfs" --grow --maxsize=1 --size=1
part swap --fstype="swap" --size=2048
part / --asprimary --fstype="xfs" --grow --size=1
%post
rm -rf /etc/udev/rules.d/70
ln -s /dev/null /etc/udev/rules.d/80-net-name-slot.rules
%end
验证ks.cfg文件是否有错误:
# ksvalidator ks.cfg
PXE+DHCP+TFTP+FTP/APACHE/NFS网络自动安装系统:
PXE客户端在网卡上:
1.PXE客户端通过DHCP获取IP地址,DHCP分配IP地址,
2.pxelinux.0 到TFTP服务器获取
3.pxelinux.cfg 到TFTP服务器获取
4.vmlinuz 到TFTP服务器获取
5.initrd.img 到TFTP服务器获取
6.启动linux内核 到TFTP服务器获取
7.启动systemd进程
实验环境:
DHCP/TFTP IP:172.16.10.1
HTTP/FTP/NFS IP:172.16.10.1
防火墙关闭:iptables
安装DHCP服务器:
vim /etc/dhcp/dhcpd.conf
subnet 192.168.215.0 netmask 255.255.255.0{
range dynamic-bootp 192.168.215.100 192.168.215.200;
option broadcast-address 192.168.215.255;
option routers 192.168.215.1;
option subnet-mask 255.255.255.0;
option domain-name-servers 192.168.215.1;
filename "pxelinux.0";
next-server 192.168.215.99 #tftp的地址
default-lease-time 21600;
max-lease-time 43200;
安装TFTP服务端:
yum install -y tftp-server syslinux
vim /etc/xinetd.d/tftp
service tftp
{
socket_type = dgram
protocol = udp
wait = yes
user = root
server = /usr/sbin/in.tftpd
server_args = -s /var/lib/tftpboot
disable = no #将yes修改成no
per_source = 11
cps = 100 2
flags = IPv4
}
systemctl start xinetd
[root@foundation0 xinetd.d]# systemctl start xinetd
[root@foundation0 xinetd.d]# ss -antulp | grep tftp
[root@foundation0 xinetd.d]# systemctl start tftp.socket
[root@foundation0 xinetd.d]# systemctl start tftp.service
[root@foundation0 xinetd.d]# ss -antulp | grep tftp
tcp UNCONN 0 0 :::69 :::* users:
(("in.tftpd",6092,0),("systemd",1,28))
#关闭selinux
[root@foundation0 xinetd.d]# getenforce
Enforcing
[root@foundation0 xinetd.d]# setenforce 0
[root@foundation0 xinetd.d]# getenforce
Permissive #只警告不阻止
#禁止防火墙
[root@foundation0 xinetd.d]# systemctl stop firewalld
}
详细安装过程:
为了满足同时安装上百台linux,而且不需要人工干预。这就需要PXE来通过网线自动安装linux
PXE+Kickstart+DHCPD+HTTPD+TFTP
1.搭建yum源来下载必要的工具
这么用的是aliyun:
CentOS 7
wget -O /etc/yum.repos.d/CentOS-Base.repo http://mirrors.aliyun.com/repo/Centos-7.repo
或者
curl -o /etc/yum.repos.d/CentOS-Base.repo http://mirrors.aliyun.com/repo/Centos-7.repo
之后运行yum makecache生成缓存
2.下载syslinux,dhcp,http,tftp-server。
1.[root@localhost etc]# yum -y install syslinux dhcp httpd tftp-server
2.Loaded plugins: fastestmirror, langpacks
3.Loading mirror speeds from cached hostfile
4.Package syslinux-4.05-12.el7.x86_64 already installed and latest version
5.Package 12:dhcp-4.2.5-42.el7.centos.x86_64 already installed and latest version
6.Package httpd-2.4.6-40.el7.centos.x86_64 already installed and latest version
7.Package tftp-server-5.2-12.el7.x86_64 already installed and latest version
8.Nothing to do
yum -y install syslinux dhcp httpd tftp-server
3.下载自动安装kickstart工具命令
yum -y install system-config-kickstart
1.[root@localhost ~]# yum -y install system-config-kickstart
2.Loaded plugins: fastestmirror, langpacks
3.Loading mirror speeds from cached hostfile
4.Package system-config-kickstart-2.9.2-4.el7.noarch already installed and latest version
5.Nothing to do
4.搭建一个http的安装源。
进入/var/www/html ,并创建一个目录CentOS用来挂载镜像
1.[root@localhost ~]# cd /var/www/html/
2.[root@localhost html]# ls
3.CentOS ks.cfg
4.[root@localhost html]# mount /dev/sr0 /var/www/html/CentOS
注意:没那个CentOS目录的先创建一个目录。(那个ks.cfg先不用管,下步再教如何生成)。
命令是 mkdir /var/www/html/CentOS 。然后再挂载(sr0是镜像,也可以写成其他的镜像之类的)。
#dd if=/dev/sr0 of=/usr/local/src/Centos7_1/CentOS7_1.iso #将光盘的文件做成本地的镜像文件,以后就不用挂载了
#mount -t /usr/local/src/Centos7_1/CentOS7_1.iso /mnt/#将本地ISO镜像文件挂载到本地的/mnt目录下
或者直接将光盘里的文件直接复制到/var/www/html/CentOS目录下
再执行以下命令
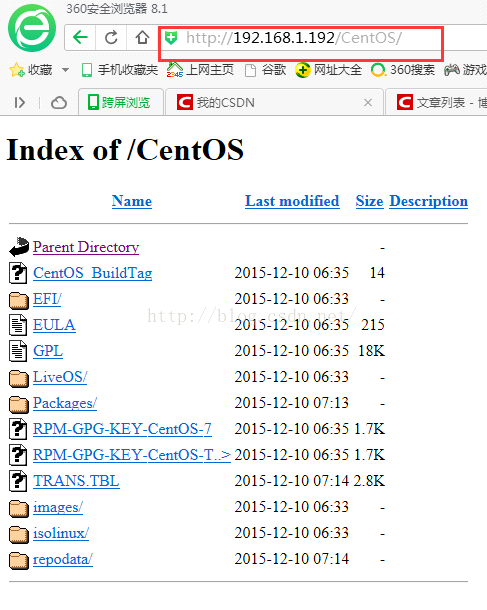
1.[root@localhost html]# systemctl start httpd
2.[root@localhost html]# systemctl stop firewalld
可以在浏览器里。输入IP/CentOS.可以看到下图就代表成功
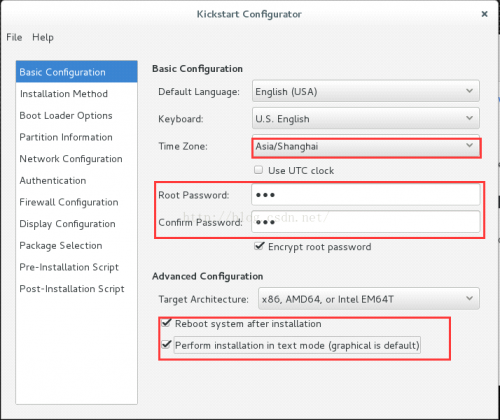
5.用system-config-kickstart工具来生成一个自动的安装的配置文件
运行命令,并弹出一个图形界面
1.[root@localhost ~]# system-config-kickstart
按下列图形填
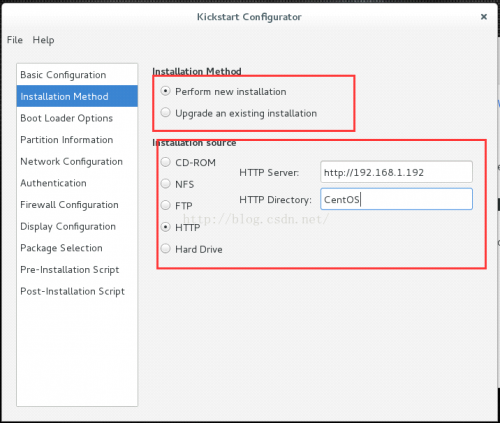
第二个:Installation Method(这个填自己IP,HTTP Directory就填自己那个光盘镜像的目录)
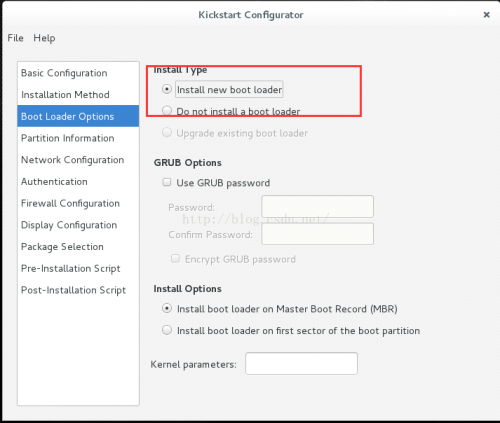
第三个。Boot Loader Options
第四个。Partition Information
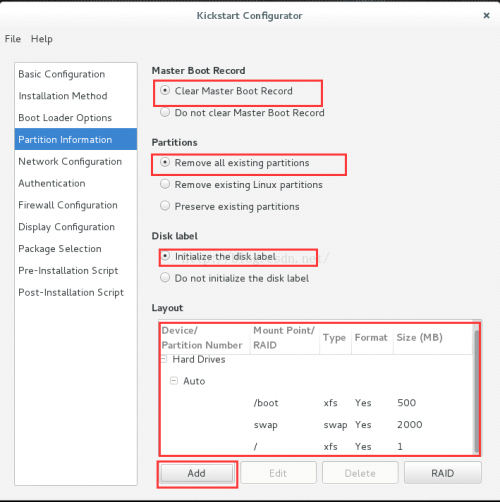
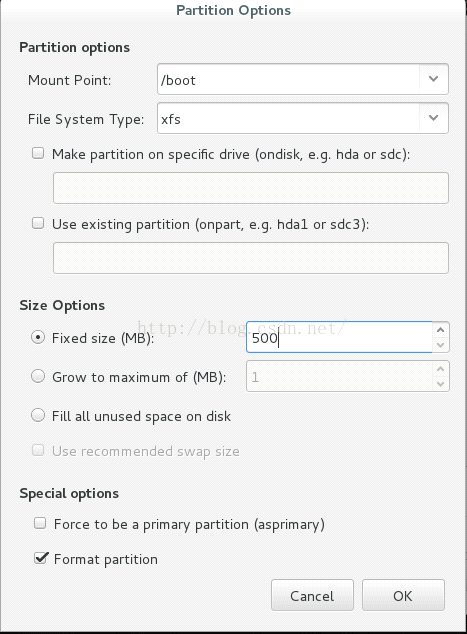
分区自己操作吧。点下面那个Add(那个1代表占用剩余磁盘)
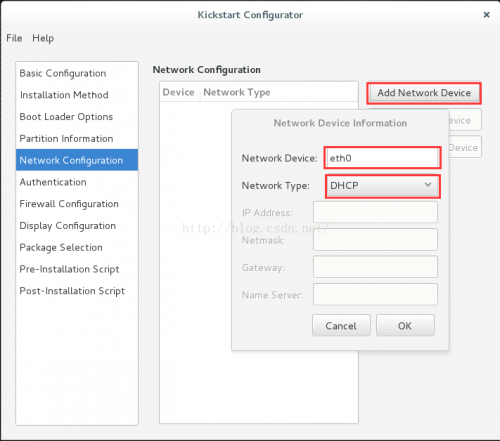
第五个 NetWork Configuration
第六个(我没说的选项不用改)
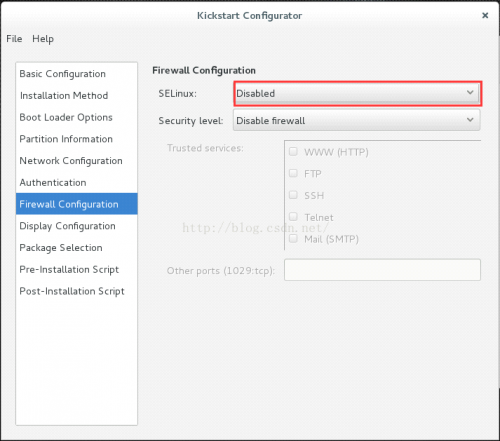
第七个
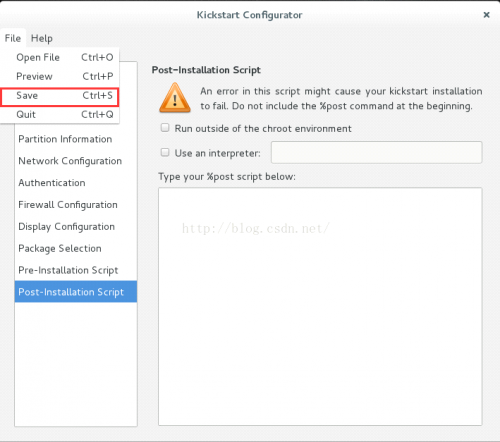
保存下来,(因为CentOS7下这个软件的问题。还需要在vim编辑一下ks.cfg这个文件)
打开这个ks.cfg这个文件。在最后面加上
%packages
@base
%end
保存后。使用如下命令检查一下是否有语法错误
1.[root@localhost ~]# ksvalidator ks.cfg
2.[root@localhost ~]#
将该文件移到/var/www/html/ks.cfg
1.[root@localhost html]# ls
2.CentOS ks.cfg
3.[root@localhost html]# pwd
4./var/www/html
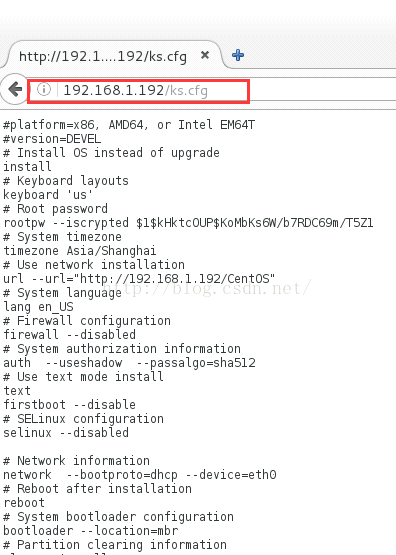
再重启网络服务。
[root@localhost html]# systemctl restart httpd
如果能够在浏览器下看到如下的话,证明上述过程好了(这次我用的火狐浏览器。不要在意这些细节。。)
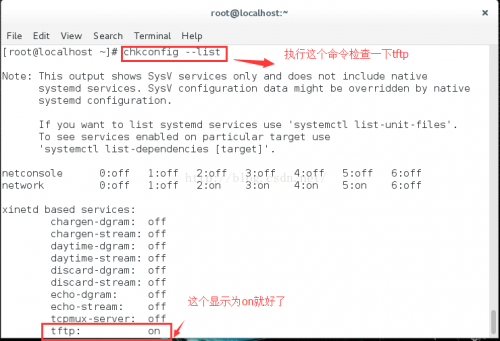
6.配置tftp(这个文件的位置在左下角)
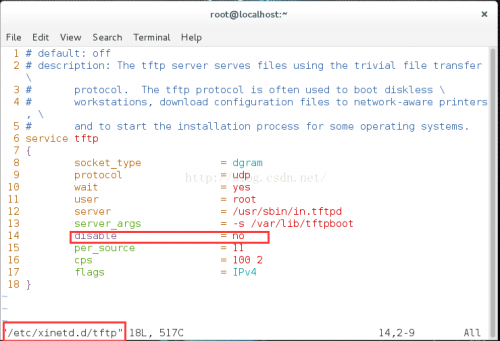
再执行命令
如果没有安装,先安装xinetd:
#yum install xinetd.x86_64
[root@localhost ~]# systemctl start xinetd
7.将必要文件放到tftpboot内
[root@localhost ~]# cp /usr/share/syslinux/pxelinux.0 /var/lib/tftpboot/
[root@localhost ~]# mkdir /var/lib/tftpboot/pxelinux.cfg
将镜像内的isolinux下的所有东西都考到tftpboot下
[root@localhost CentOS]# cp /var/www/html/CentOS/isolinux/* /var/lib/tftpboot/
再将isolinux.cfg拷给pxelinux.cfg下命名为default
[root@localhost CentOS]# cp /var/lib/tftpboot/isolinux.cfg /var/lib/tftpboot/pxelinux.cfg/default
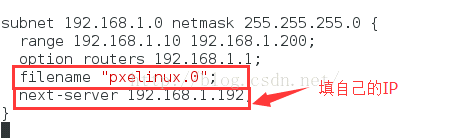
8.配置dhcp服务器
在/etc/dhcp下编辑 dhcpd.conf 文件
这个文件下写如下内容
1.option domain-name "example.org";
2.option domain-name-servers 114.114.114.114;
3.
4.default-lease-time 6000;
5.max-lease-time 72000;
6.
7.log-facility local7;
8.
9.subnet 192.168.1.0 netmask 255.255.255.0 {
10. range 192.168.1.10 192.168.1.200;
11. option routers 192.168.1.1;
12. filename "pxelinux.0";
13. next-server 192.168.1.192;
14.}
注意:
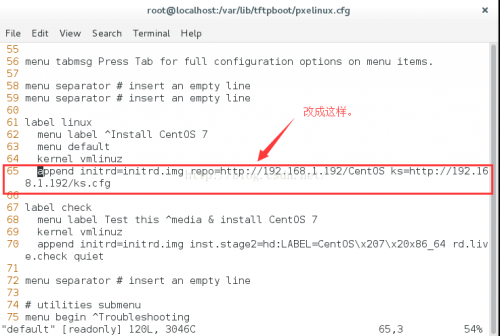
好了。最后一步!!修改文件。这个文件是/var/lib/tftpboot/pxelinux.cfg/default
(还有就是将63行 加上menu default ,删去69行的menu default)
最后。再重启一下服务吧!!!!!(关闭防火墙)
1.<span style="font-size:18px;">[root@localhost pxelinux.cfg]# systemctl restart httpd
2.[root@localhost pxelinux.cfg]# systemctl restart xinetd
3.[root@localhost pxelinux.cfg]# systemctl restart dhcpd
4.[root@localhost pxelinux.cfg]# systemctl stop firewalld
5.</span>
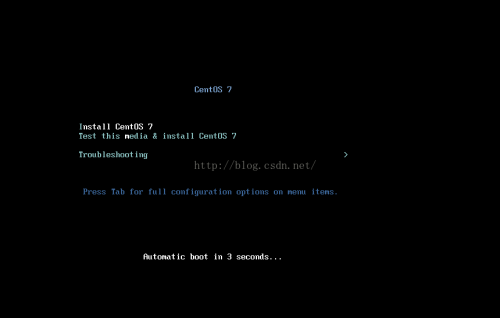
来。用vmware试试效果
1.创建新的虚拟机
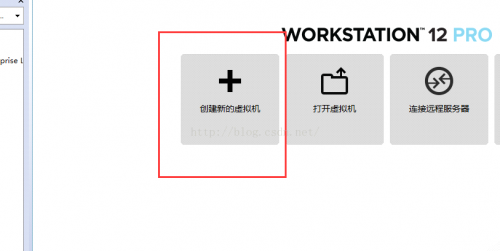
2.选择稍后安装操作系统
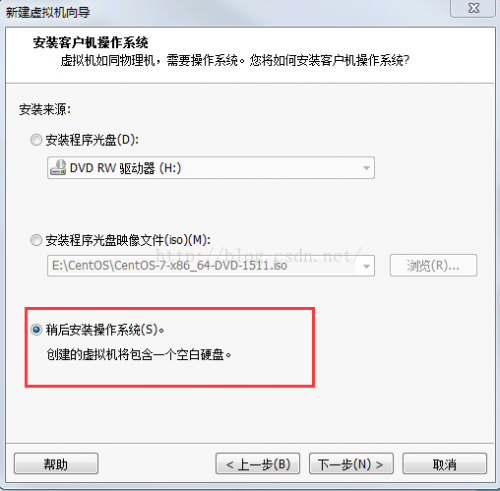
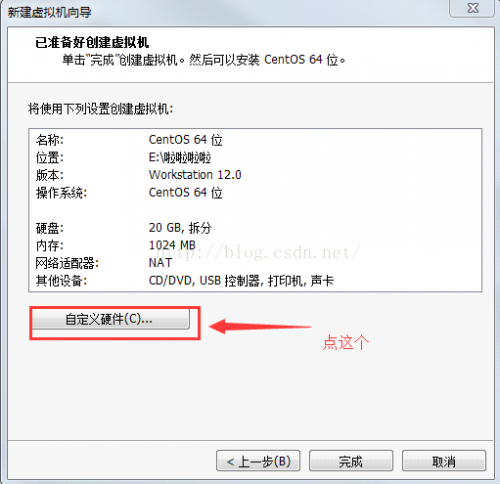
3.以后的都随意点。根据自己喜好
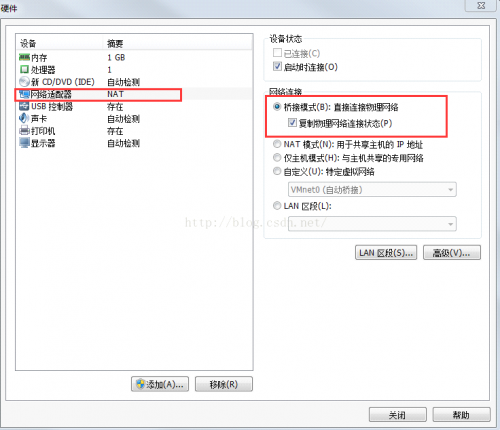
4.在这停一下
完成后。全自动安装虚拟机,无需手动!!!